Getting Started with Zenamu
After registering with Zenamu, you might wonder how to get started. Don’t worry—it’s straightforward. In this guide, we’ll walk you through the different sections of the left sidebar, how to set up Zenamu, and how to create your first open class or course.
If you haven't created an account yet, please read our guide to get started.
The Sidebar Menu
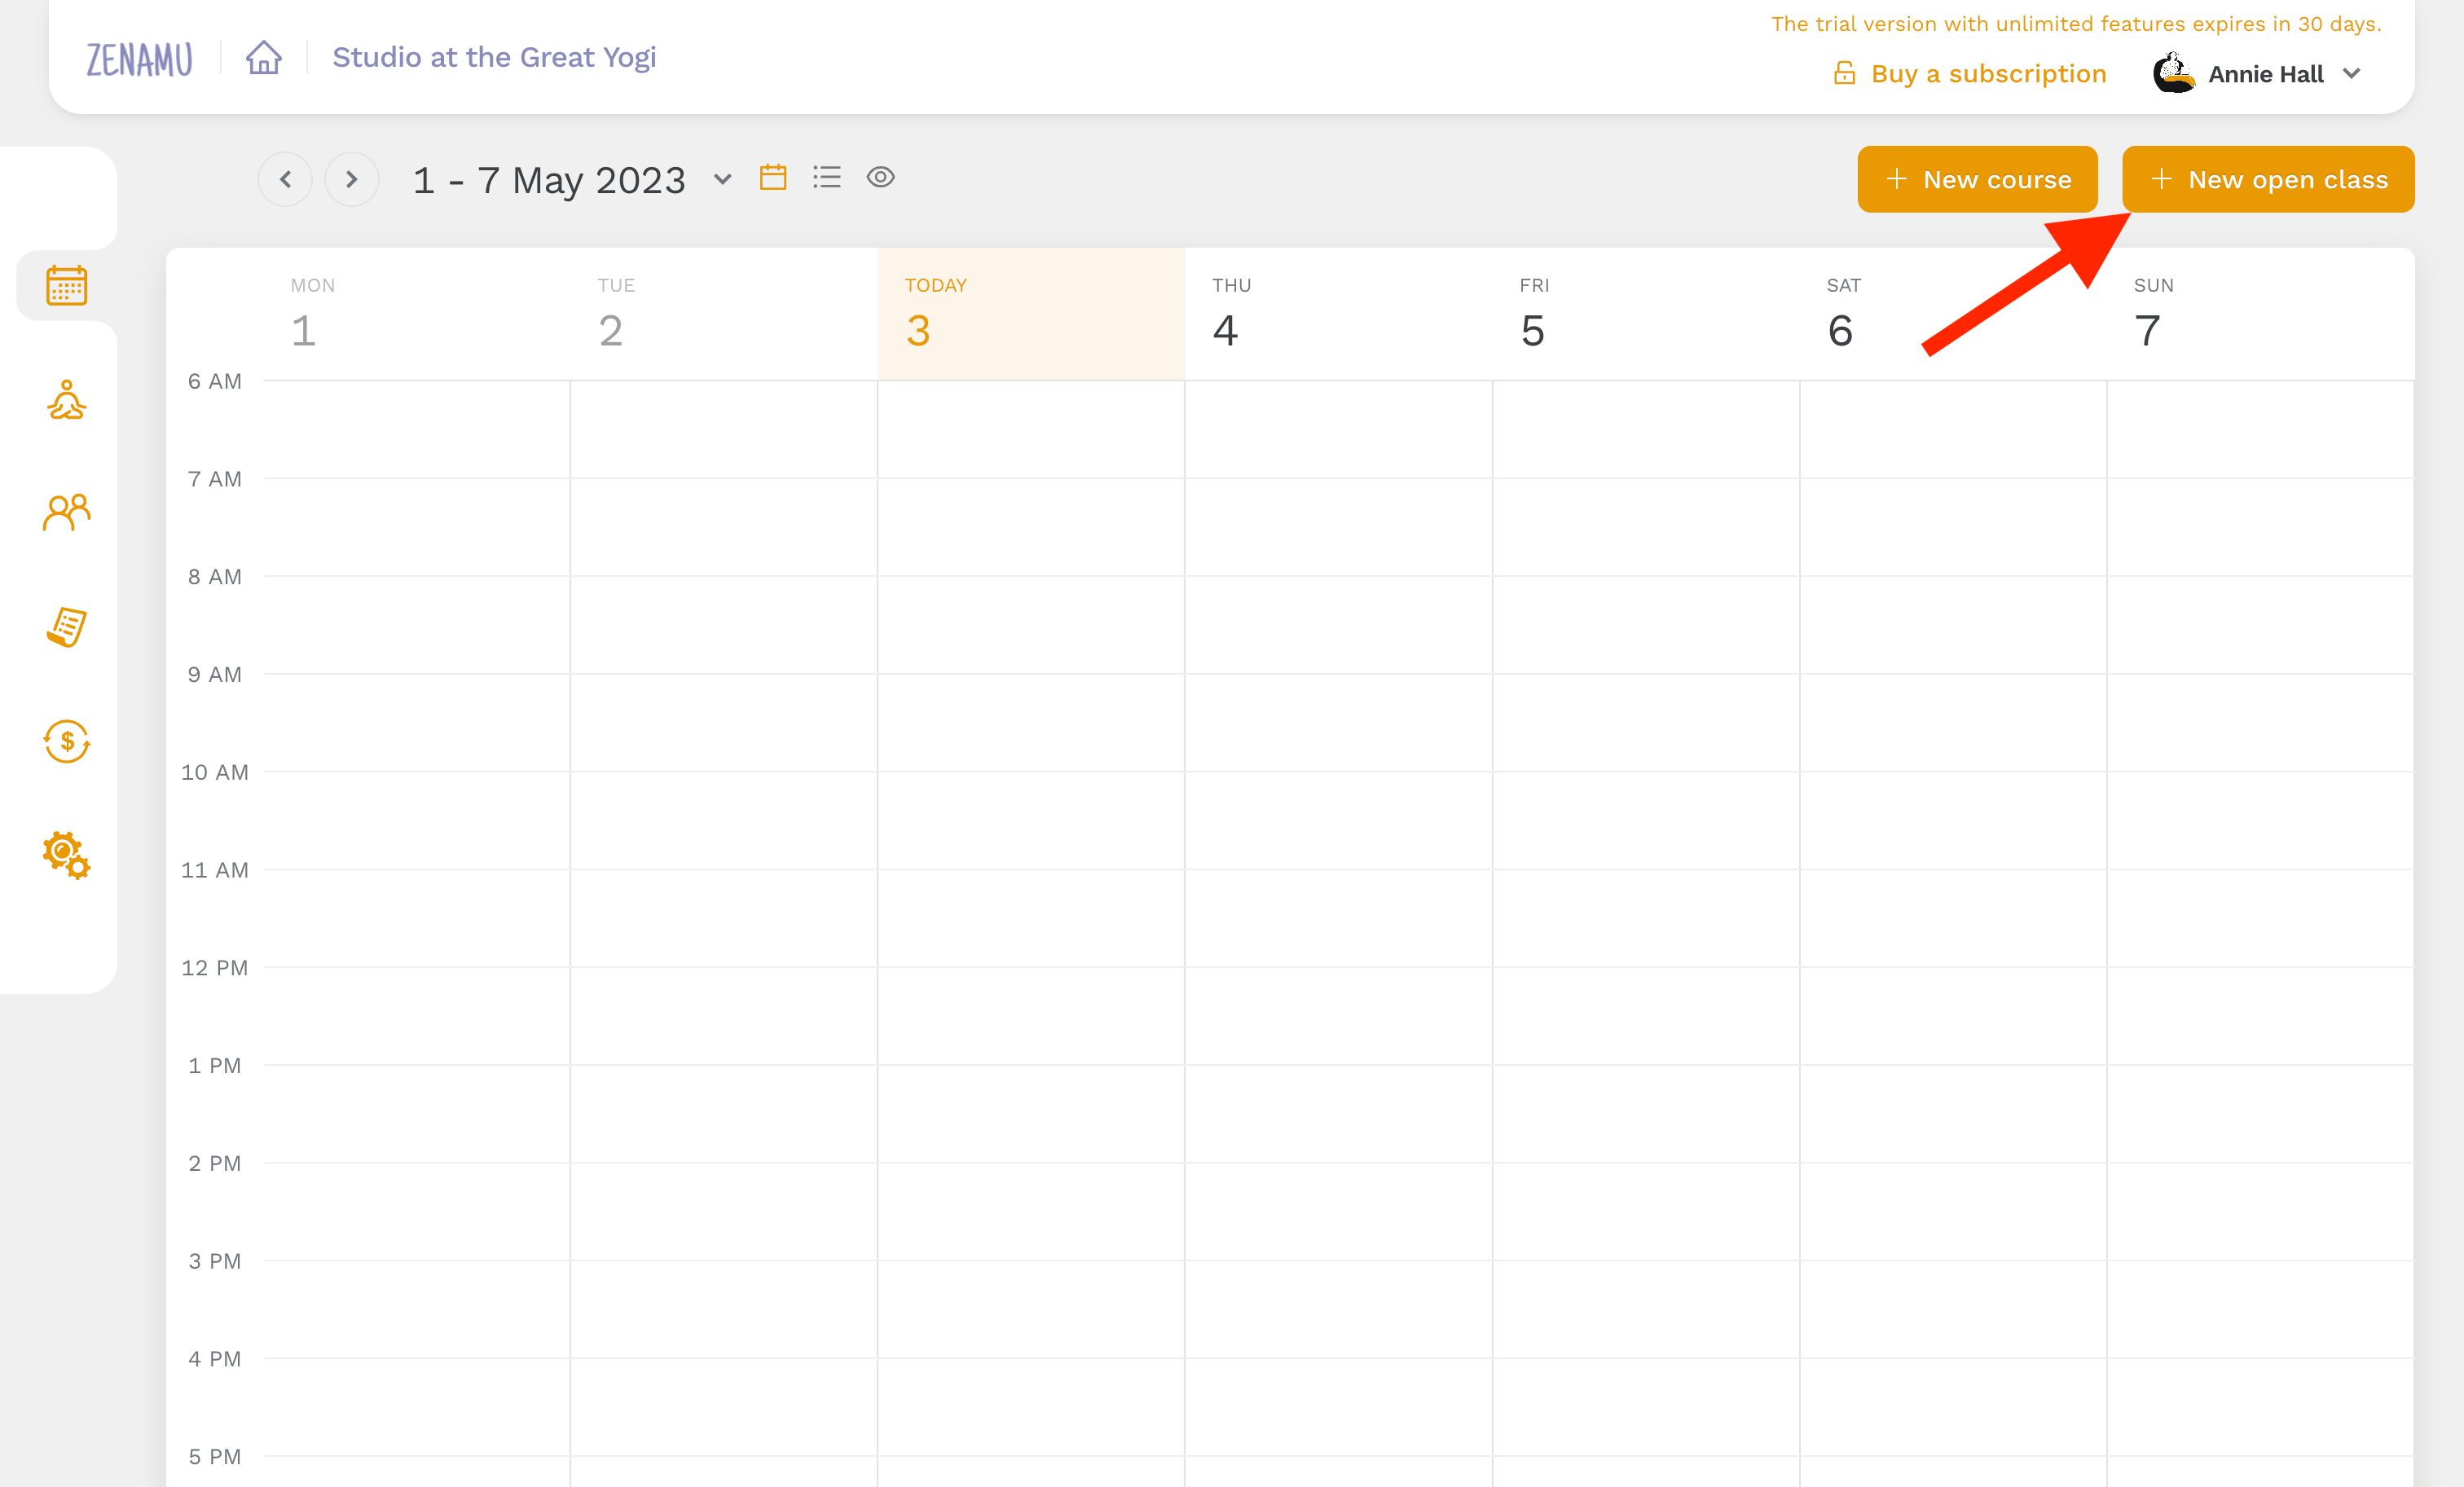
When you log into Zenamu, you'll see a sidebar on the left side of the screen. This menu gives you access to various sections of the system. The first item in the sidebar is the Class Schedule, where you can view your upcoming classes.
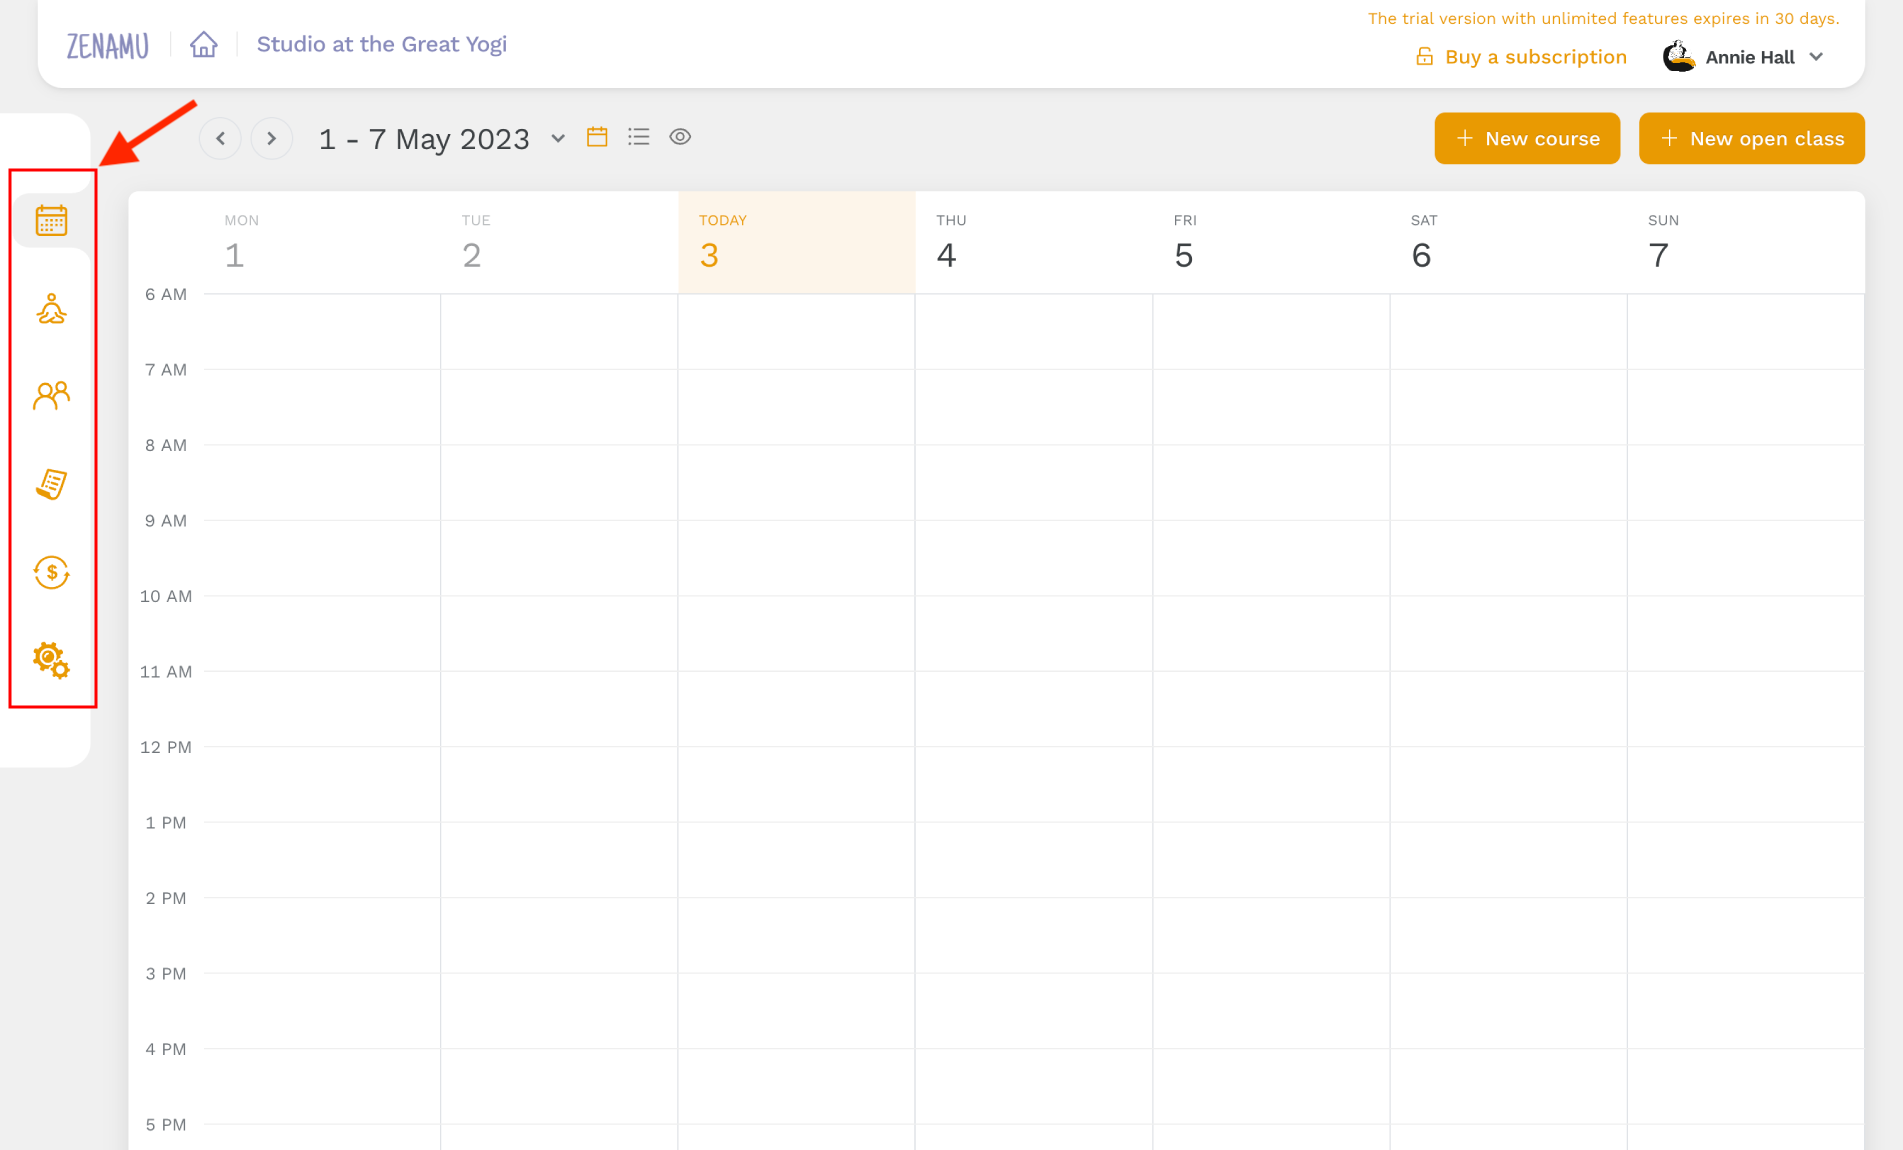
The Class Schedule displays all the classes for the current week in a clear format. To see how your timetable appears to potential clients, click the eye symbol.

My Workshops
The second item in the sidebar is My Workshops. This section is useful if you organize workshops or seminars on specific topics or techniques, in addition to regular classes and courses.
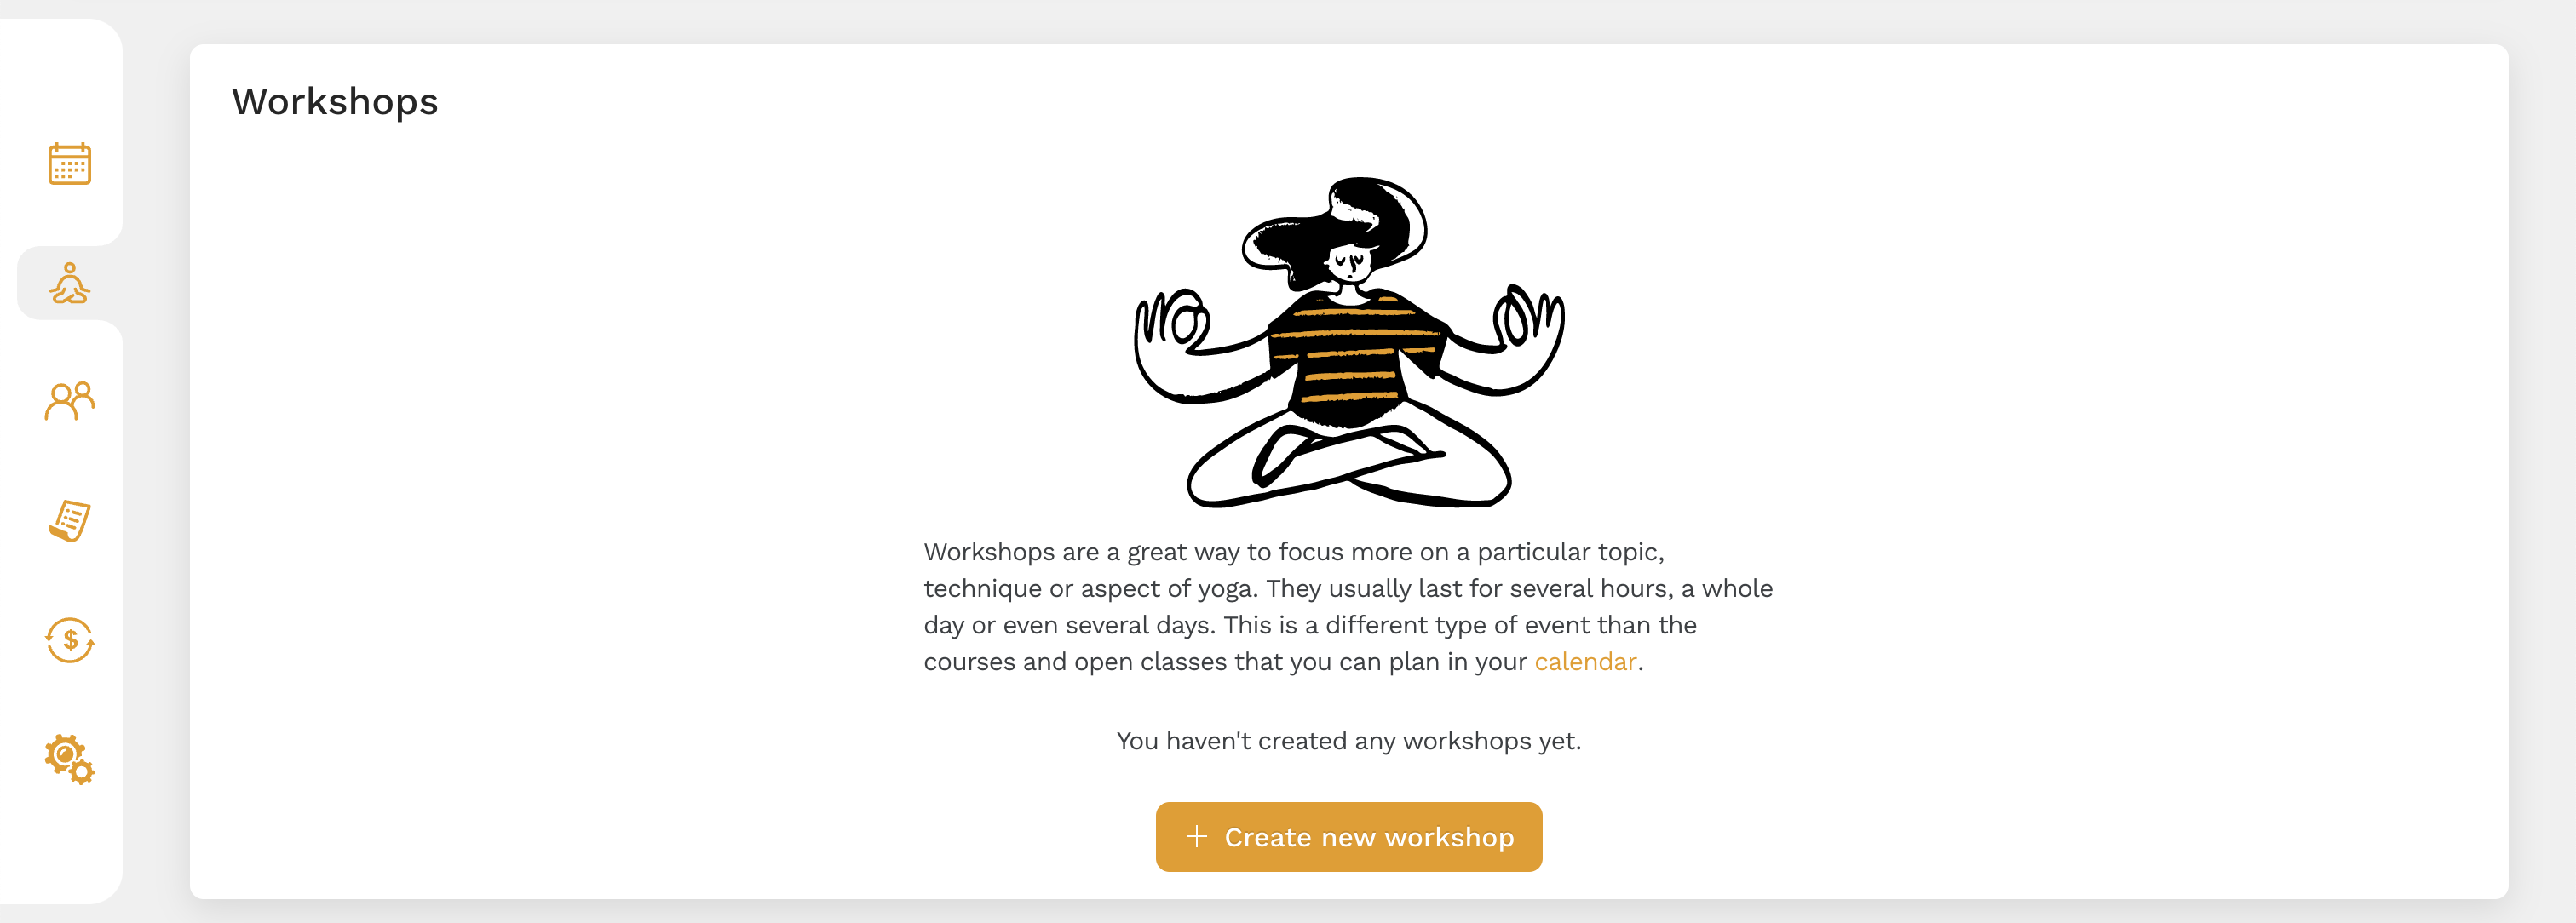
To create a new workshop, click on Create New Workshop. Here, you can add the main image, title, short description, scope, capacity, teachers, detailed description, price, address, and venue. You can preview a sample pranayama workshop below.

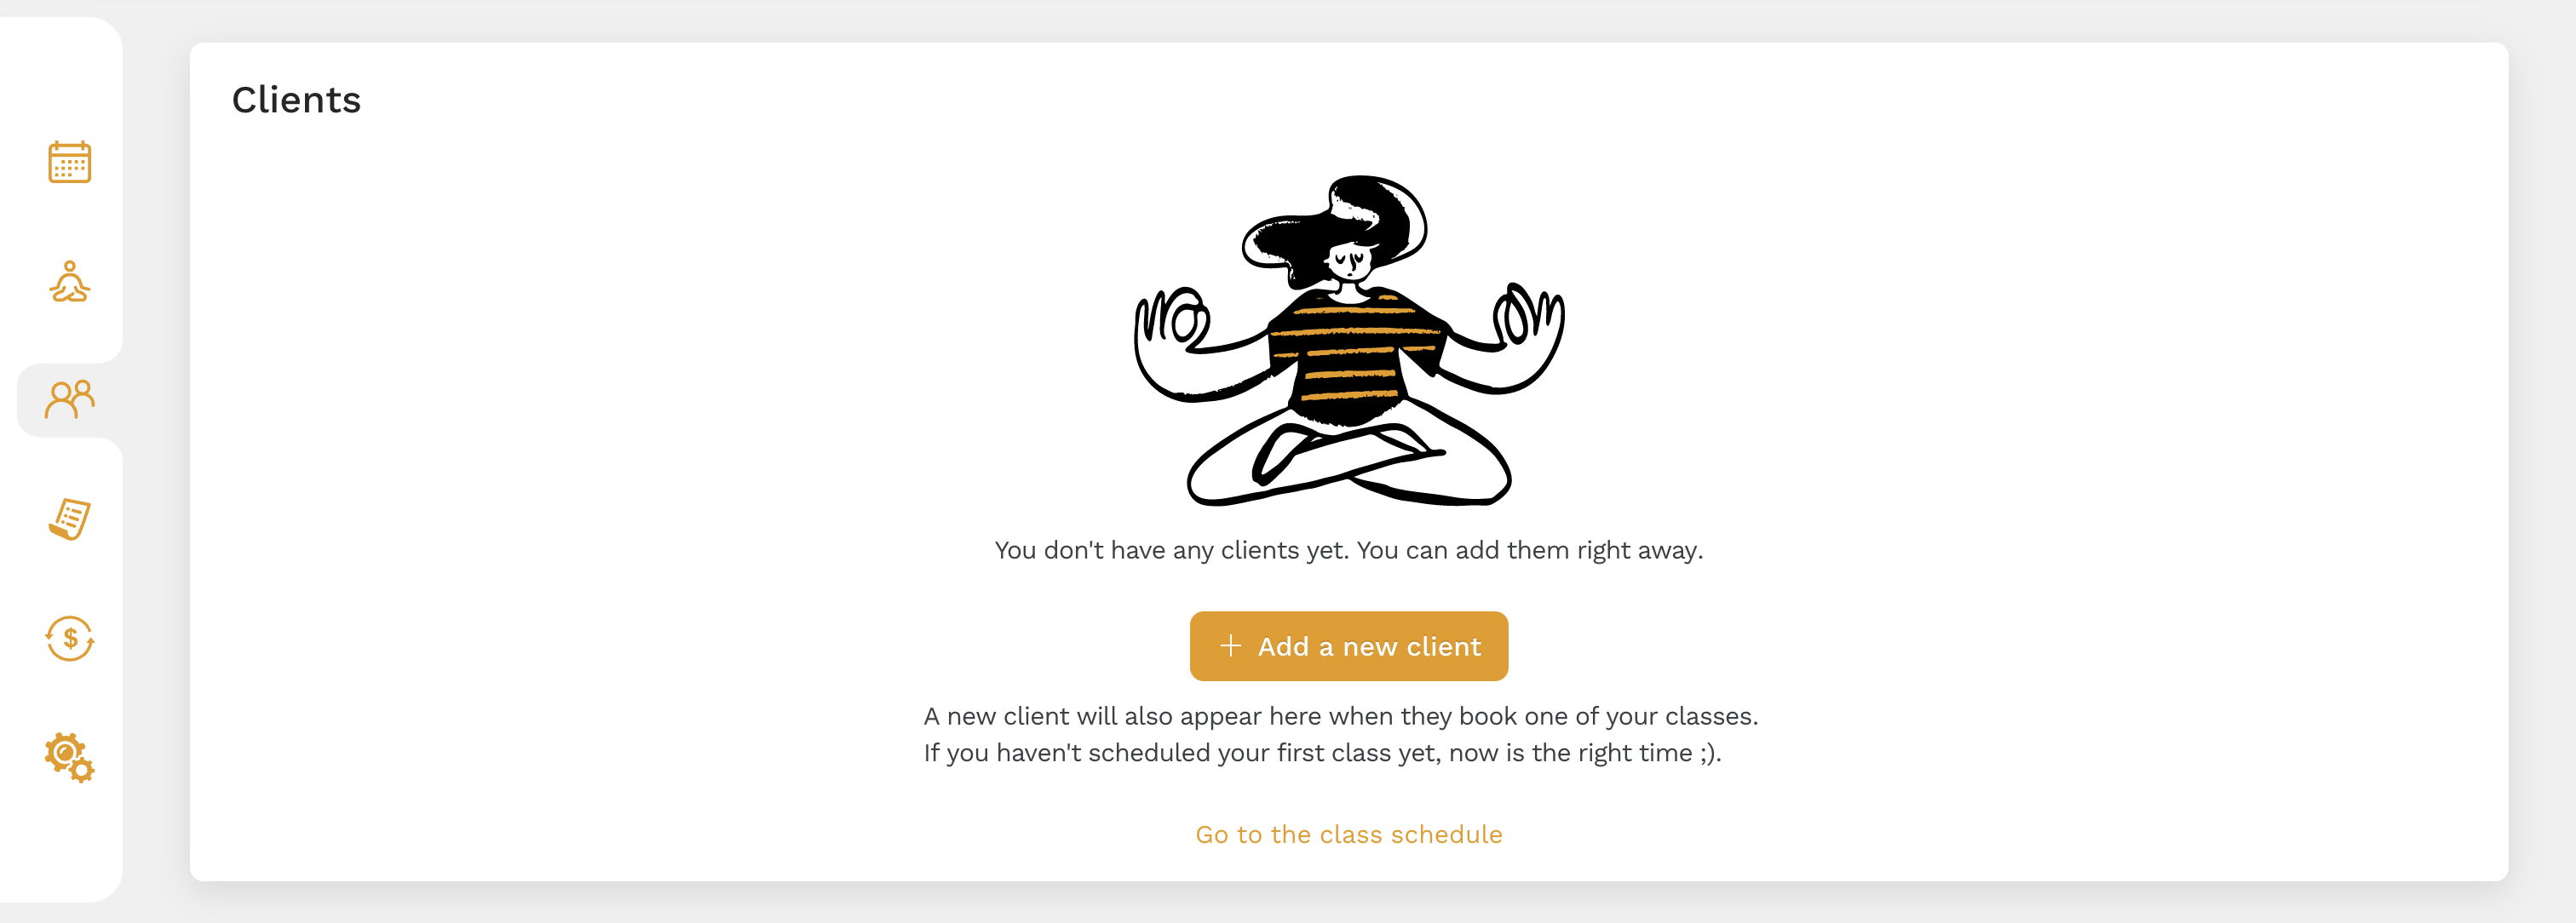
My Clients
My Clients is the next item in the sidebar. It provides a list of your clients, which includes both those you add manually and those who book classes.
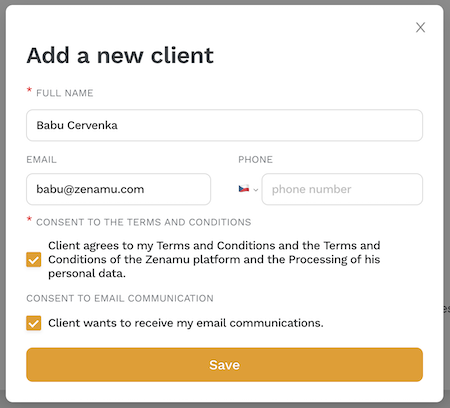
To add a new client, click on Add New Client and enter their name, email, and optional phone number. You can also indicate whether they agree to your studio's terms and Zenamu's terms and conditions, and whether they want to receive your email communications.
Note that system emails about bookings and payments will be sent to your clients regardless of their email preferences.
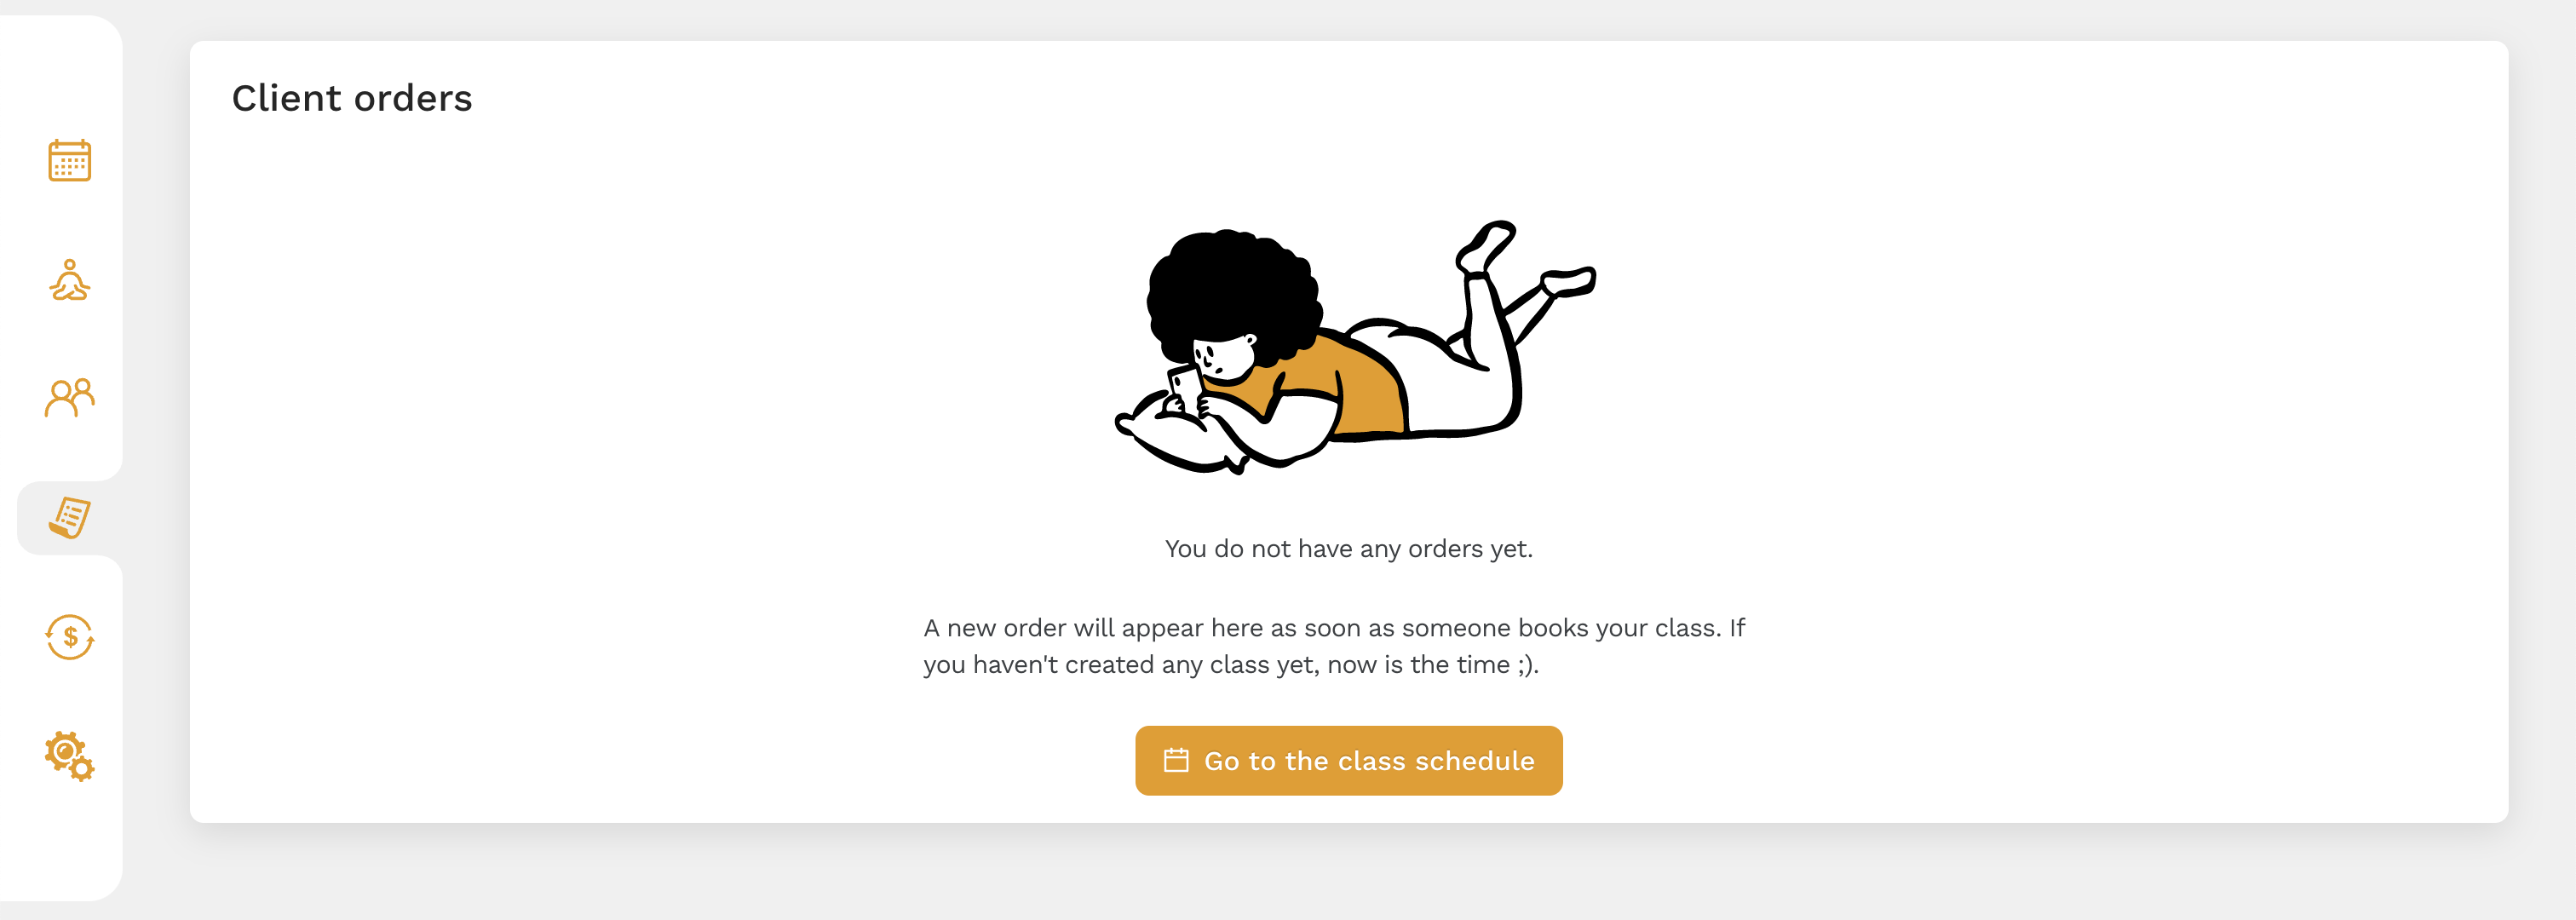
Manage Orders
Next on the sidebar is Manage Orders. This section displays all orders placed by your clients, allowing you to track their purchases.
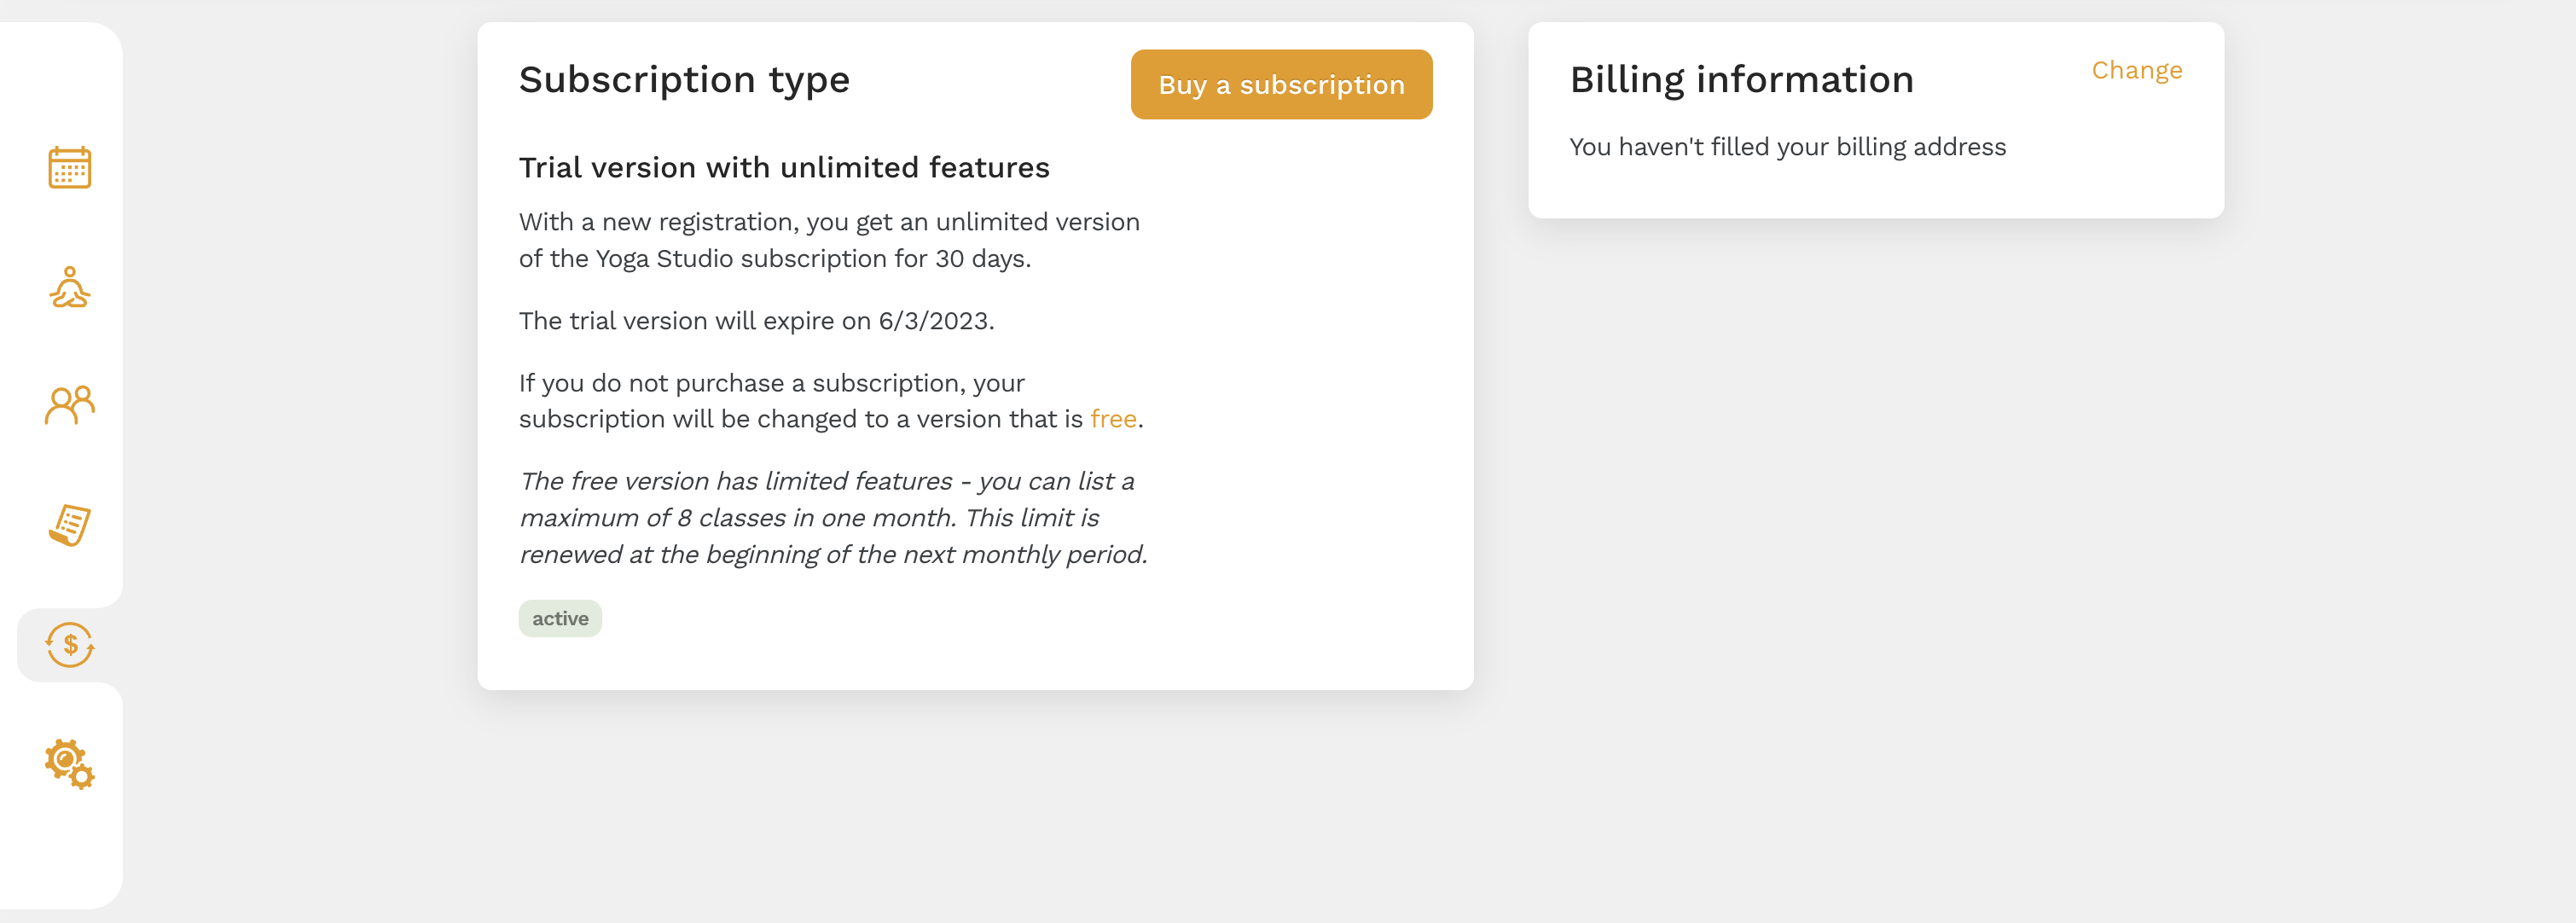
Manage My Subscription
This section shows information about your subscription and billing details. When you sign up, we offer a 14-day unlimited trial so you can fully experience the system’s features.
Settings
The last item in the sidebar is Settings, which we'll explore in more detail below.
Setting Up Zenamu
When you click on the Settings section, several tabs will appear:
- Public Schedule
- Class Booking
- Teachers (if registered as a studio)
- Locations
- Class Templates
- Notifications
- Bundles
- Payments
- Terms and Conditions and Privacy
We’ve designed this section to be intuitive, so you should quickly understand each item.
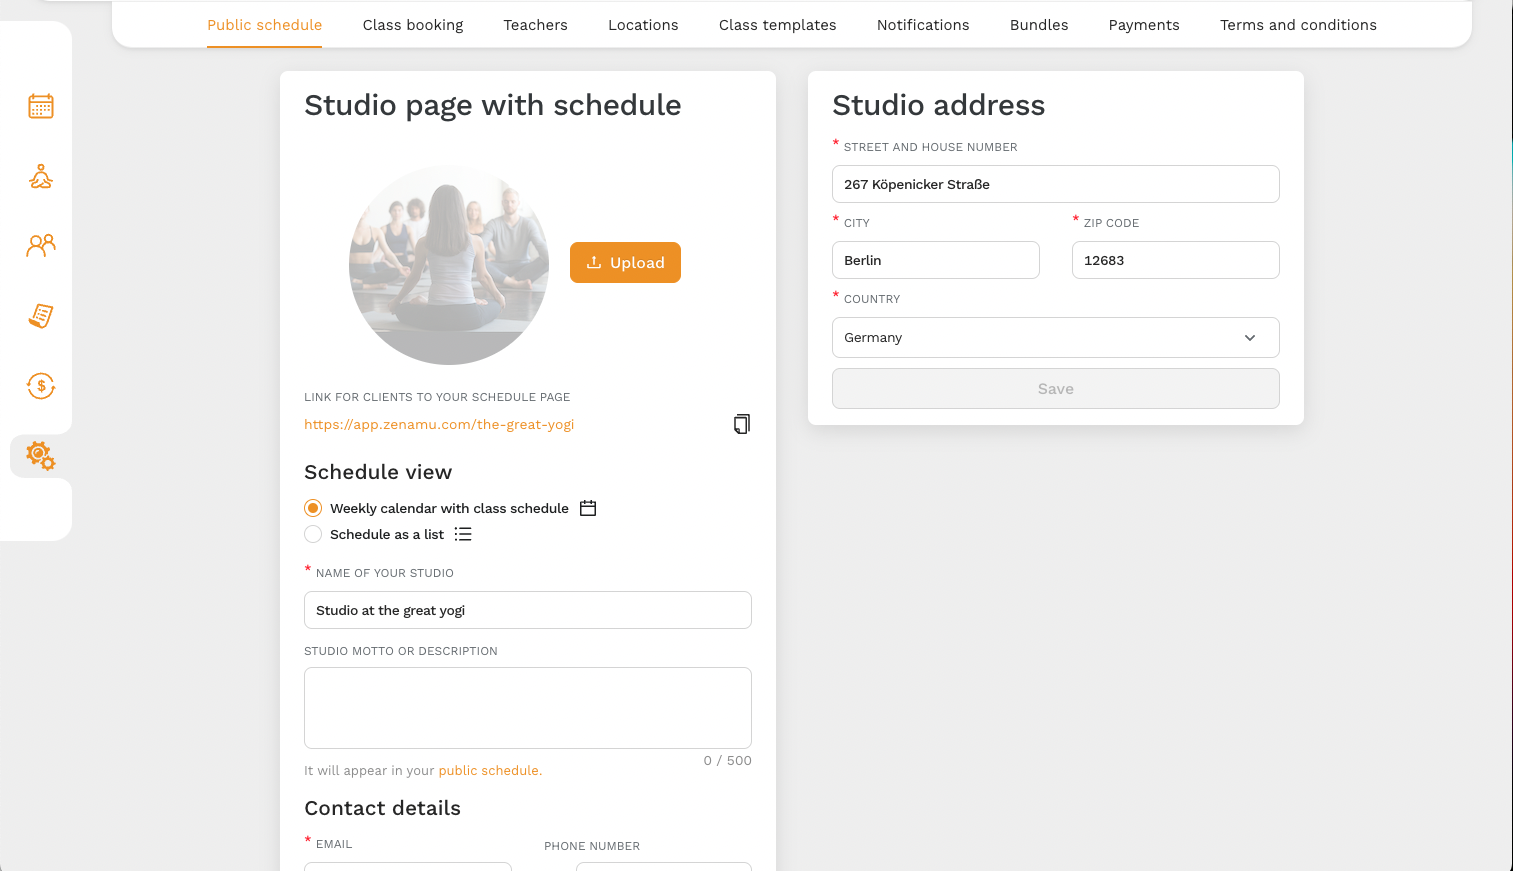
Public Schedule
On the Public Schedule tab, you can edit your studio's name, address, label, and contact details. Don’t forget to include your social media addresses so clients can easily find them. You can also choose to display your schedule as a weekly calendar or a list.
Payments
Next, go to the Payments tab to set up payment methods for your clients. By default, in-person payments on-site are enabled.
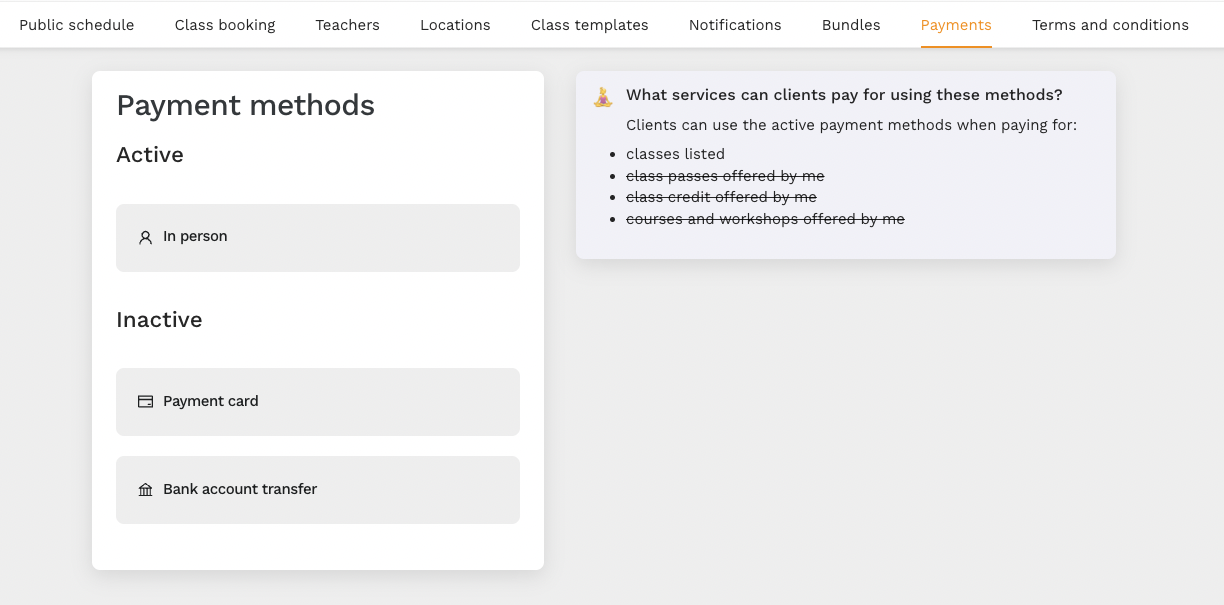
You can also set up payments through credit card or bank transfer. The process is straightforward. For bank transfers, add your bank account number and a short description, which will be shown in the public description. This enables clients to pay directly into your account.
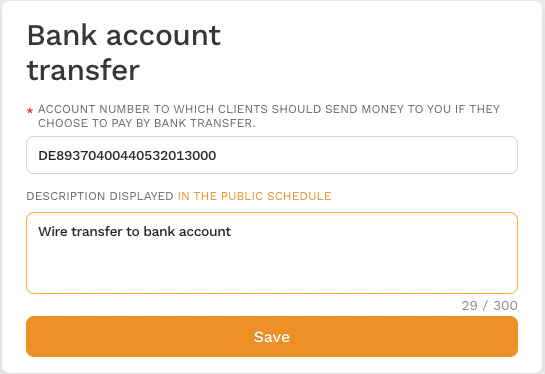
After saving, the bank transfer option will be active. The same process applies for credit card payments.
Booking
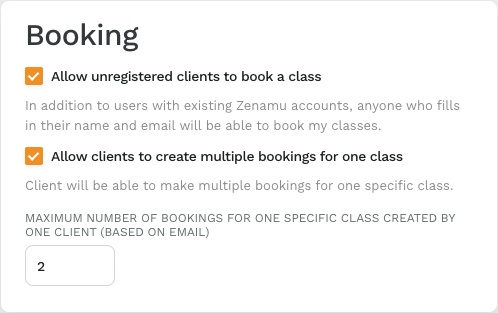
Next, click on the Bookings tab. Here, you can choose whether to allow clients to create bookings without registering or to create multiple bookings for a single class. Allowing multiple bookings can be useful if a client wants to bring a friend who doesn't have a Zenamu account.
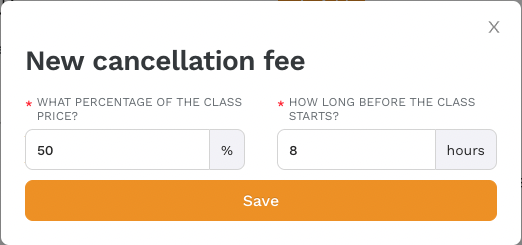
You can also set up cancellation conditions to penalize clients who cancel at the last minute. To set these conditions, click on the Add button, specify the percentage of the class price that will be charged, and the time period before the class starts during which the cancellation fee applies.
For detailed instructions, refer to the Help section.
We recommend reviewing the other tabs as well, but the settings mentioned above will cover the basics.
Teachers
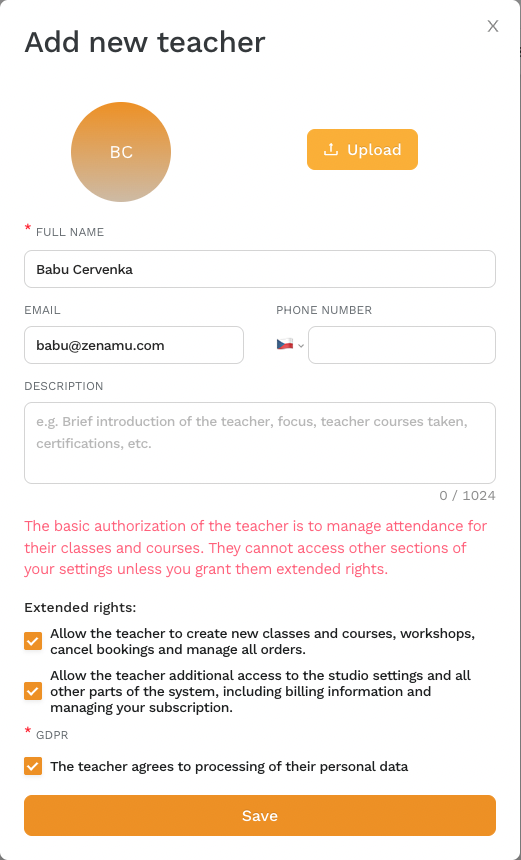
If you manage a studio with multiple teachers, you can add them under the Teachers tab. When creating a class, you can assign a teacher for that session.
To add a new teacher, click on Add and provide their photo, contact details, a caption, and their permissions. By default, a teacher can manage attendance for their own classes. You can extend their permissions to include creating new classes or workshops, canceling bookings, and managing all bookings. The highest level of permission includes access to studio settings and other system features.
Learn more about collaborator permissions in our documentation.
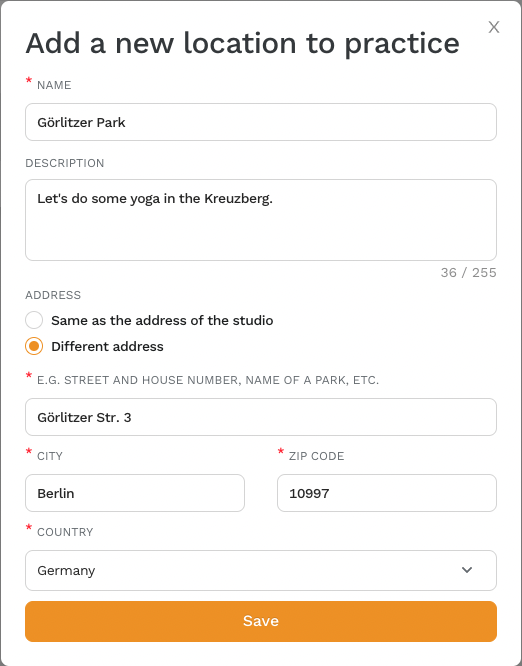
Locations
If you hold classes in multiple locations, you can add them under Locations. Fill in the address and specify whether it is the same as the studio or a different place.
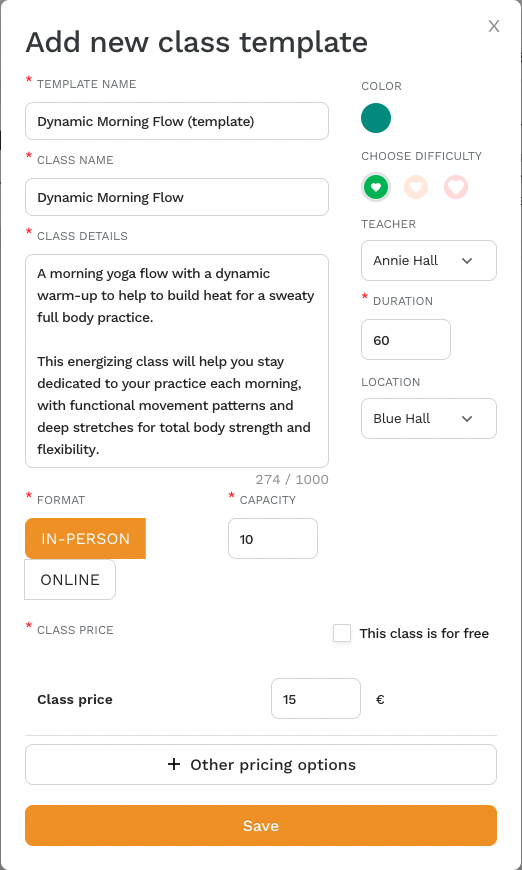
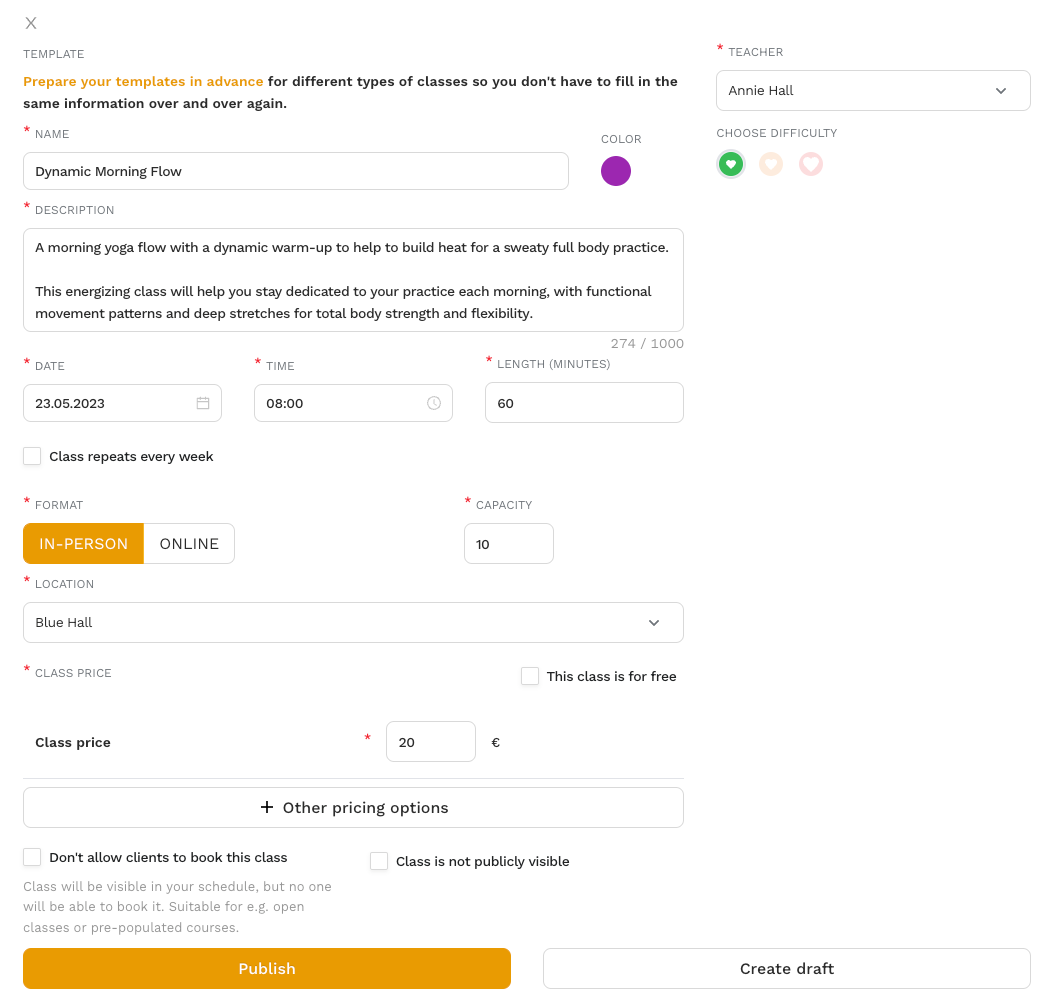
Class Templates
Use Class Templates to create classes with identical information. Click Add to enter details such as the template name, class title, description, format, capacity, price, difficulty, and more.
Notifications
The Notifications tab lets you set up email alerts for various actions, such as when a client cancels a booking, creates a new booking, or orders a bundle (credit pack, entry pass).
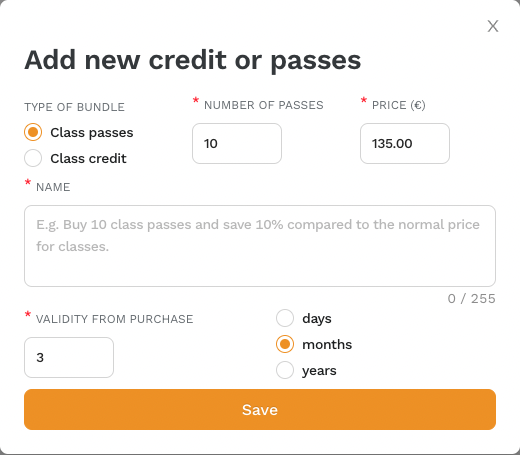
Bundles
Here, you can add new credit packs or entry passes. For example, you could create a package of 10 entries for 60 EUR, add a short description, and set a validity period of three months.
Terms and Conditions
The Terms and Conditions tab allows you to specify requirements for clients to participate in your classes. Zenamu will automatically fill in certain information from your settings, such as cancellation deadlines, whether clients can bring friends, and available payment options. You don’t need to enter this information manually.
The Privacy Policy section outlines how client data is handled. You can use a template to streamline compliance with GDPR requirements.
Creating Your First Open Class
To create a new open class, click on Class Schedule in the left sidebar, then click on the + New Open Class button.
A window will appear for class settings. You can either use a prepared class template or enter the details manually. You’ll need to specify the class title, description, date, time, length, repetition frequency, capacity, location, and price.
Clicking on Additional Pricing Options lets you add discounted prices for specific groups, such as seniors.
For example, let’s create an Ashtanga yoga class starting on April 1, 2023, repeating weekly for six months, held in the Blue Room, costing 150 CZK, with a senior discount of 100 CZK.
At the bottom of the page, you can choose whether to reject the booking (useful for pre-filled courses) and whether the class is publicly visible or private.
Don’t forget to select the teacher and difficulty level in the right-hand pane.
After creating the class, you can publish it on your schedule at zenamu.com/studio-name. For example, zenamu.com/great-yogi, as detailed in our tutorial How to Create a Zenamu Account for a Studio or Individual Teacher.
To find your unique link, go to the Public Schedule tab in the Settings section and copy the link from there.
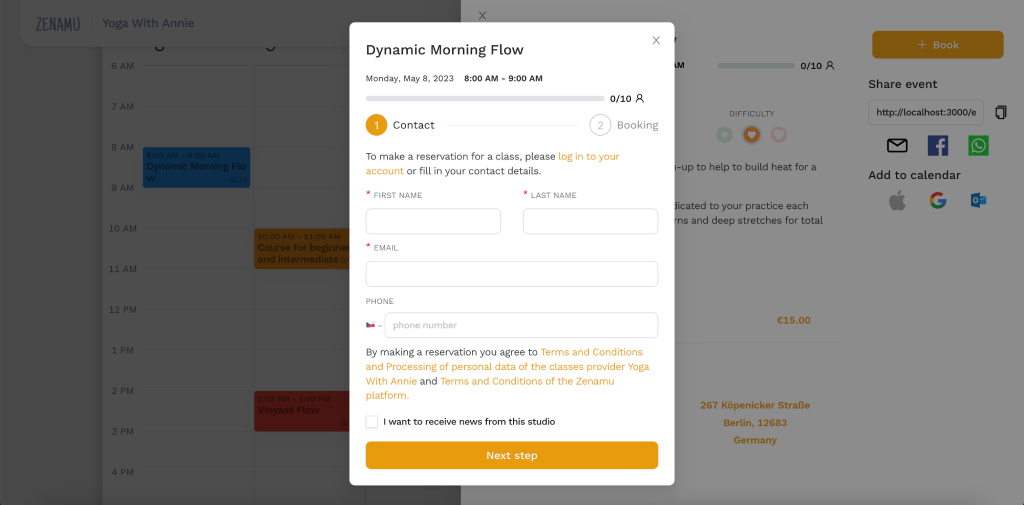
Add this link to your website so clients can easily access your schedule and make bookings. Clients only need to provide their first name, last name, and email. Optionally, they can provide a phone number and indicate if they want to receive studio updates.
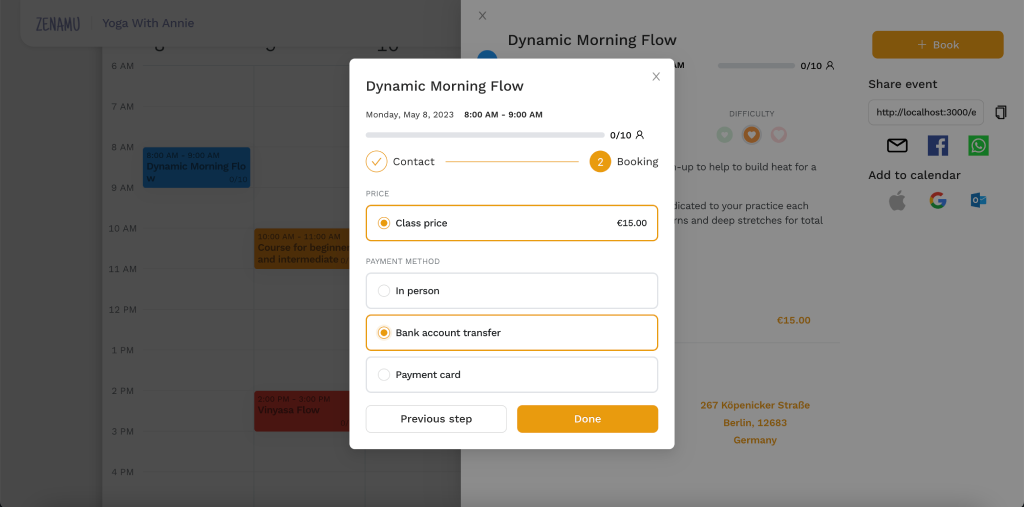
Clients then select the class price and payment method.
And that's it!
We hope this guide helps you get started with Zenamu. If you have any questions, feel free to contact us at Zenamu User Support ([email protected]).