Creating an Account in Zenamu for Studios or Individual Teachers: A Step-by-Step Guide
Congratulations on choosing to streamline your class organization and attendance management with Zenamu! To fully benefit from Zenamu’s features, you need to create an account. Here’s a step-by-step guide to get you started:
1. Creating Your Account
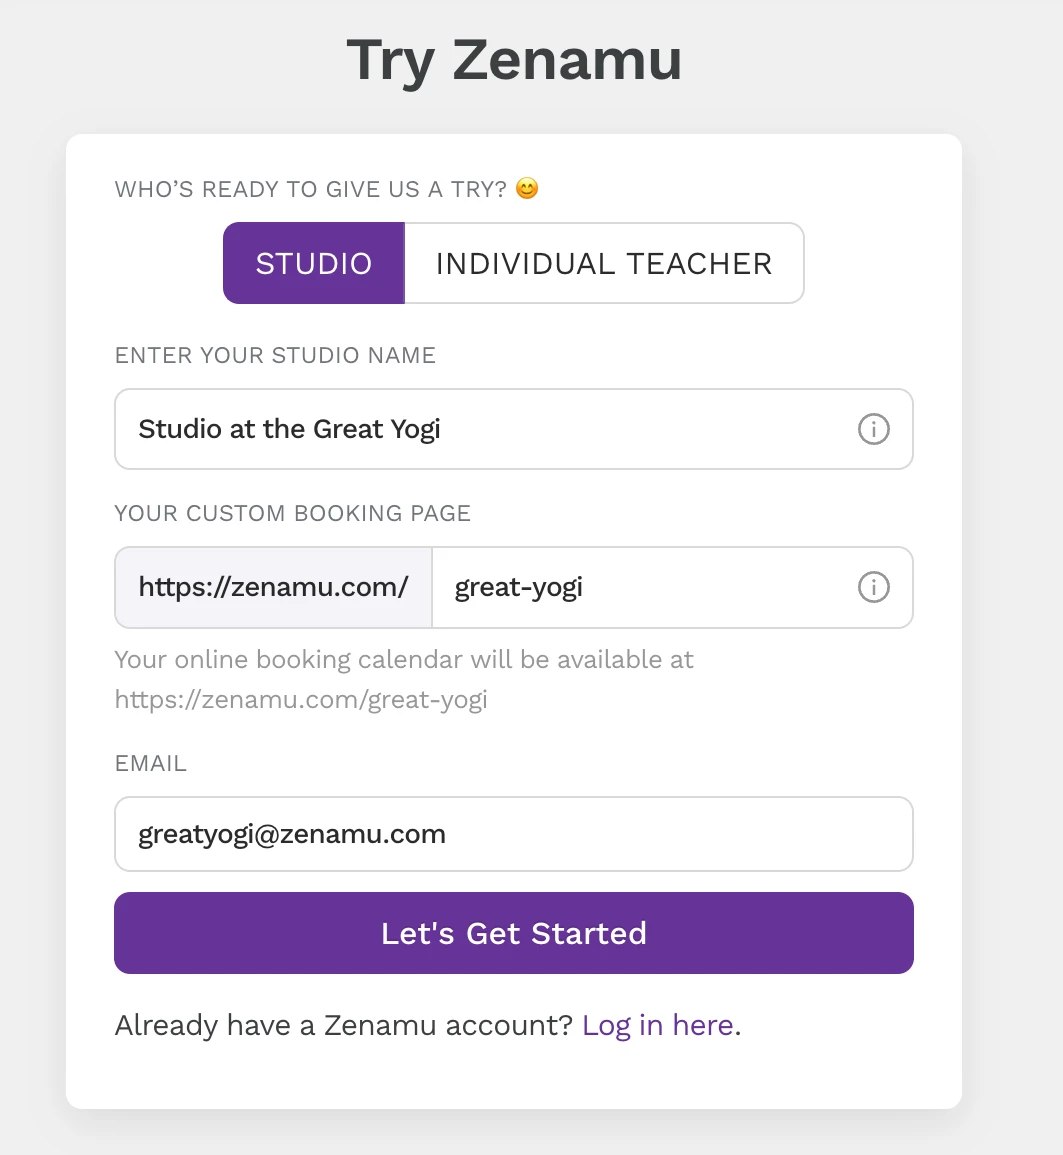
Click the registration link on our website.
Here’s a screenshot to guide you through filling out the registration form. You can also customize the URL of your unique schedule page. For instance, if your studio is called Studio at the Great Yogi, you can choose great-yogi to make the address simpler.
2. Filling in Your Account Details
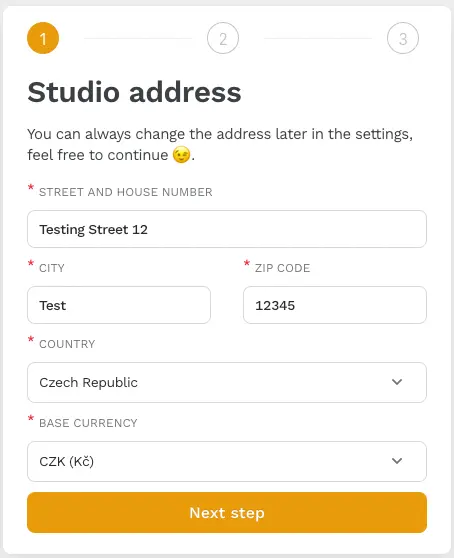
Next, provide the address of your studio or location if you registered as an individual teacher.
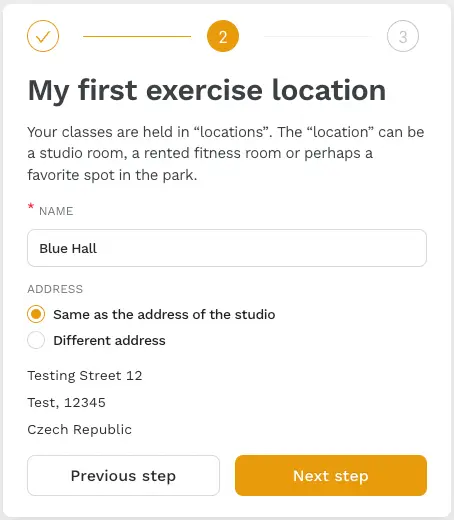
The next step involves specifying your practice’s first location, such as a hall or park. Indicate whether the address is the same as your studio’s or different. If you choose "a different address," a short form will appear for you to enter the new address.
Finally, on the Your Zenamu Account page, enter your first name, last name, and password.
We recommend creating a strong password with upper and lower case letters, at least one number, and at least one special character.

Everything correct? Great! Click "Done" to complete the account creation.
3. Exploring the Zenamu Interface
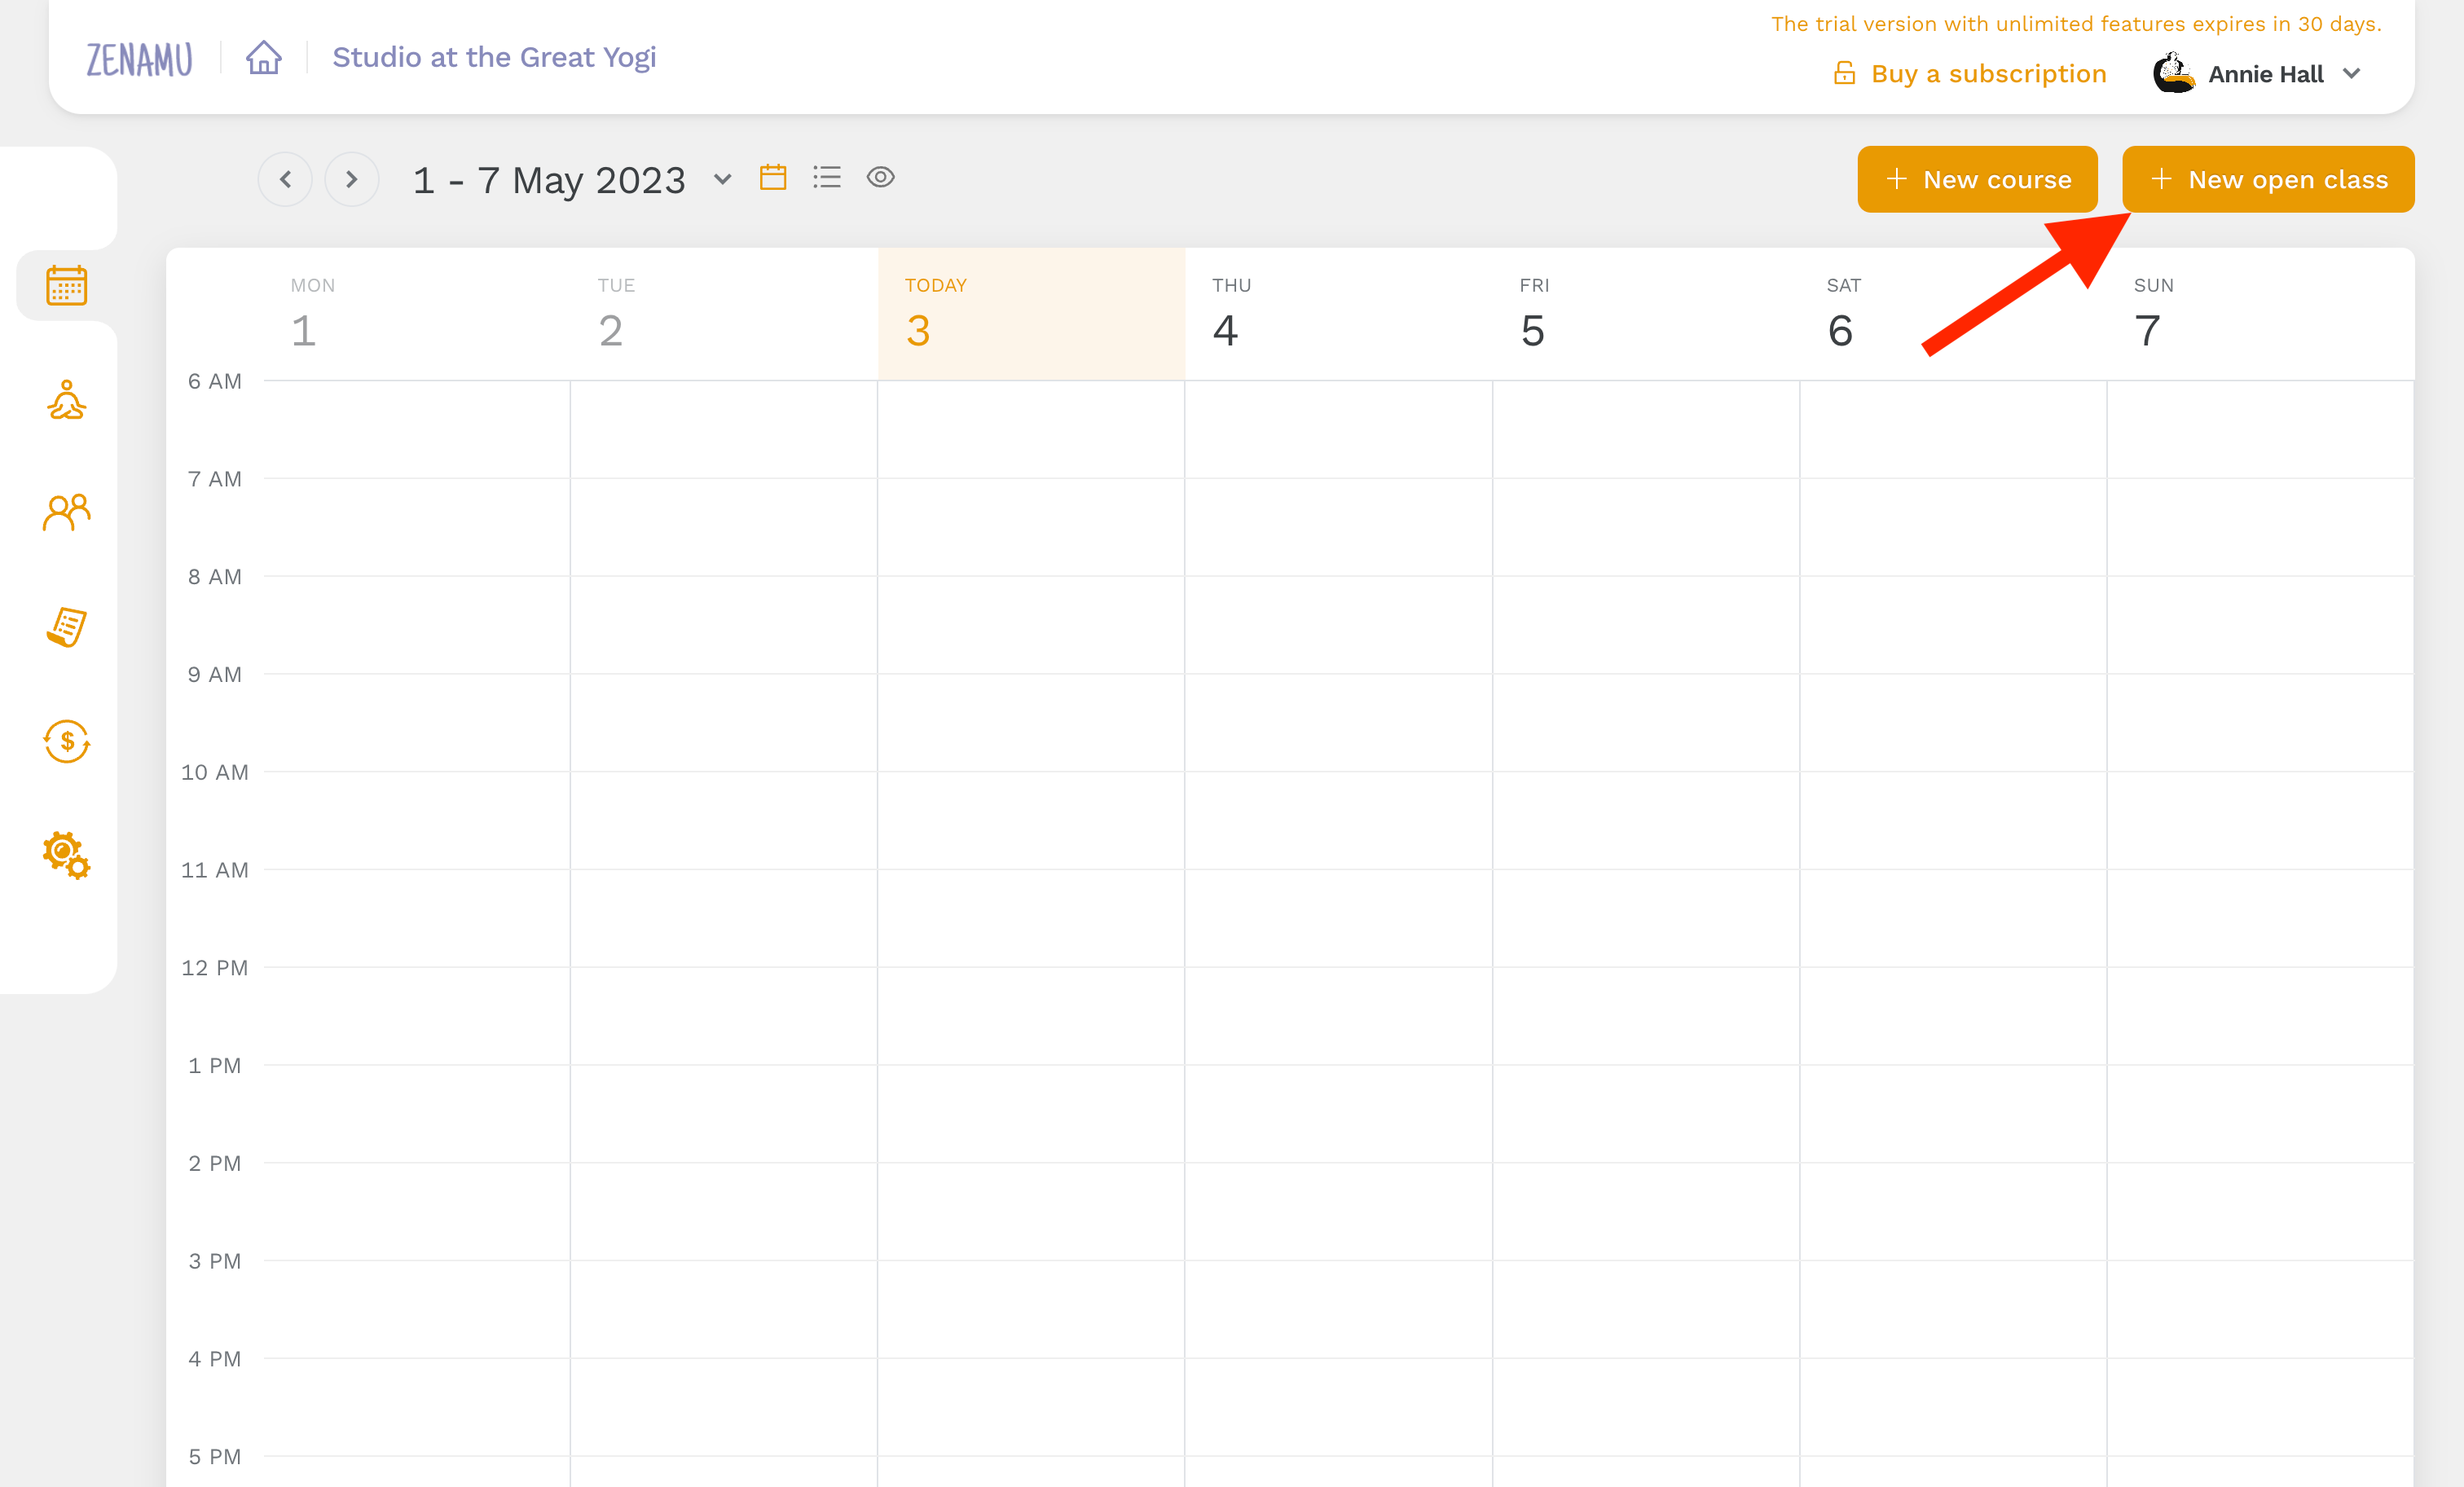
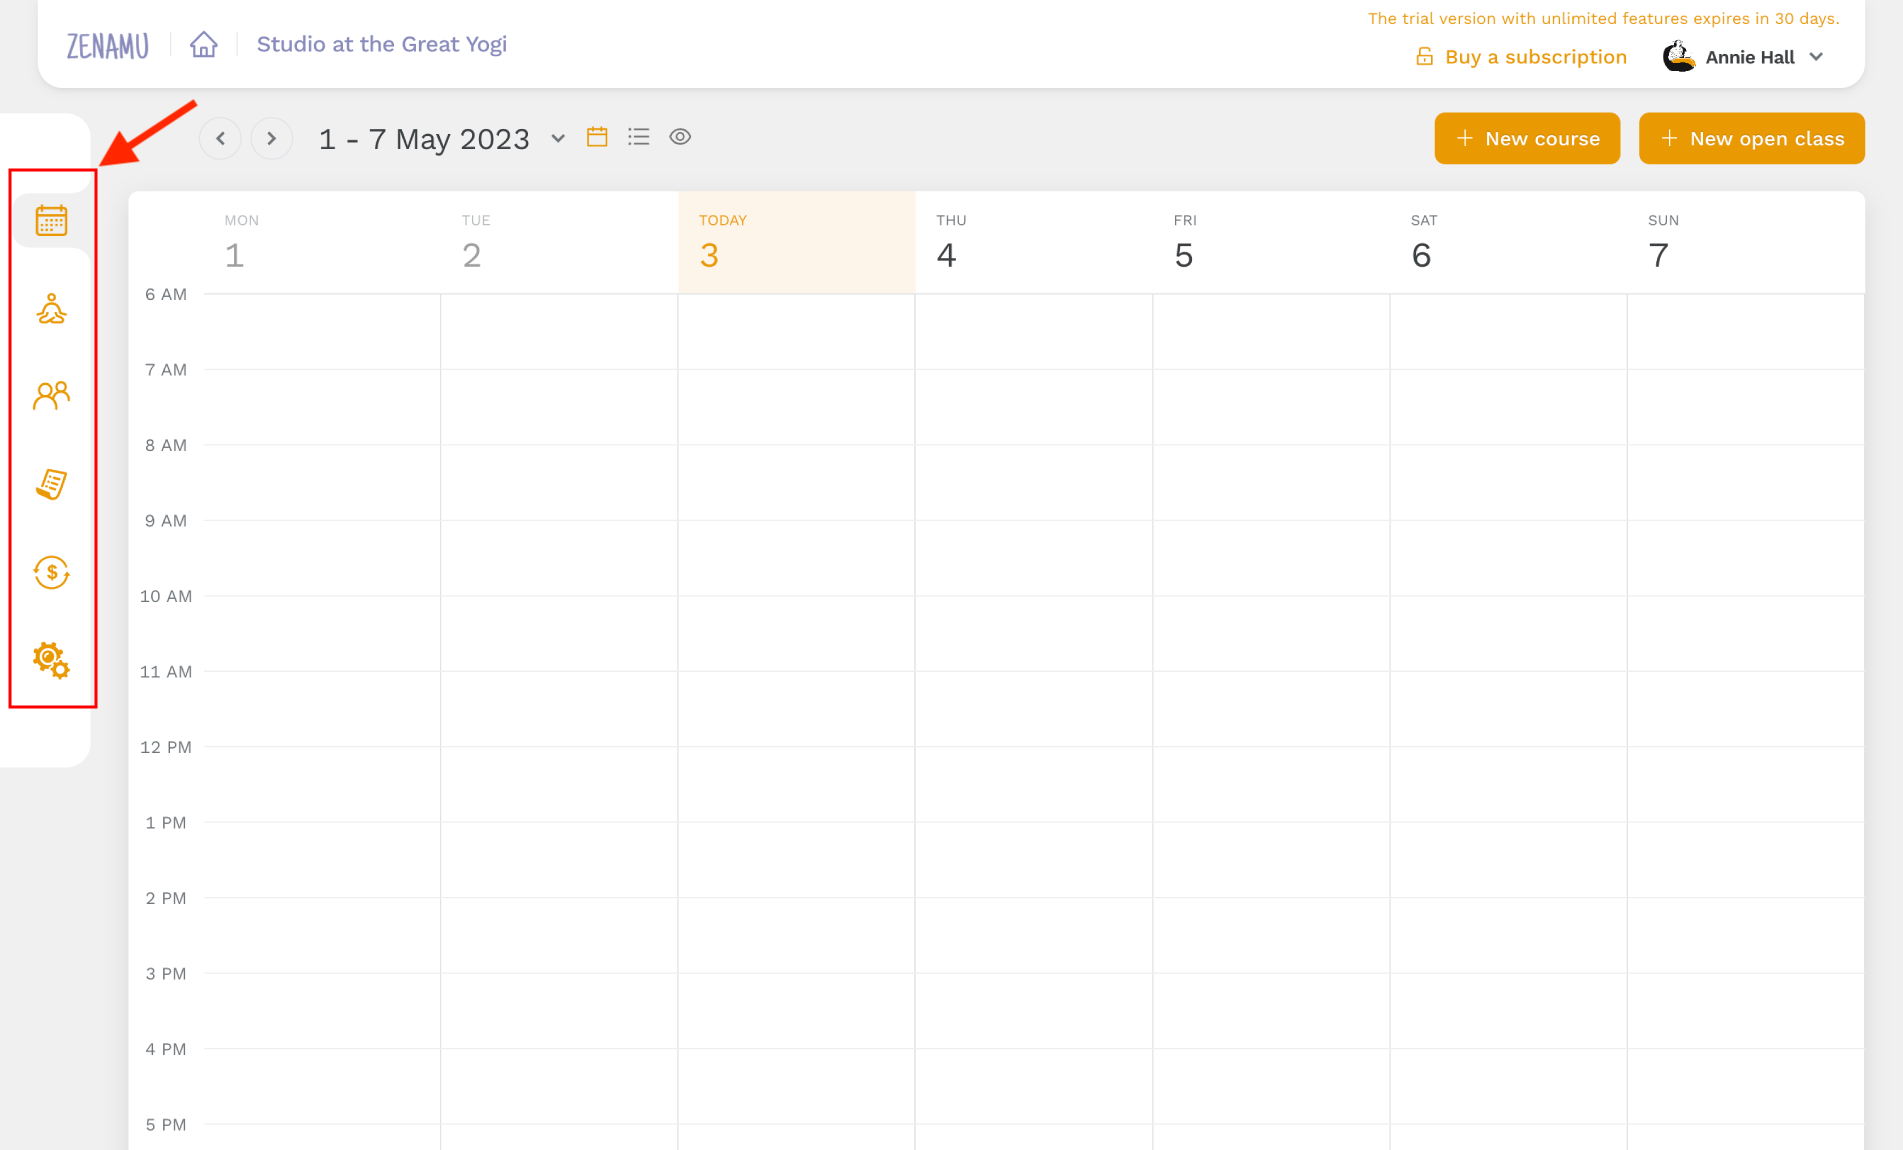
After creating your account, Zenamu will take you to the basic interface, where you can start setting up your schedule. Ready to create your first class? Click on New Open Class.
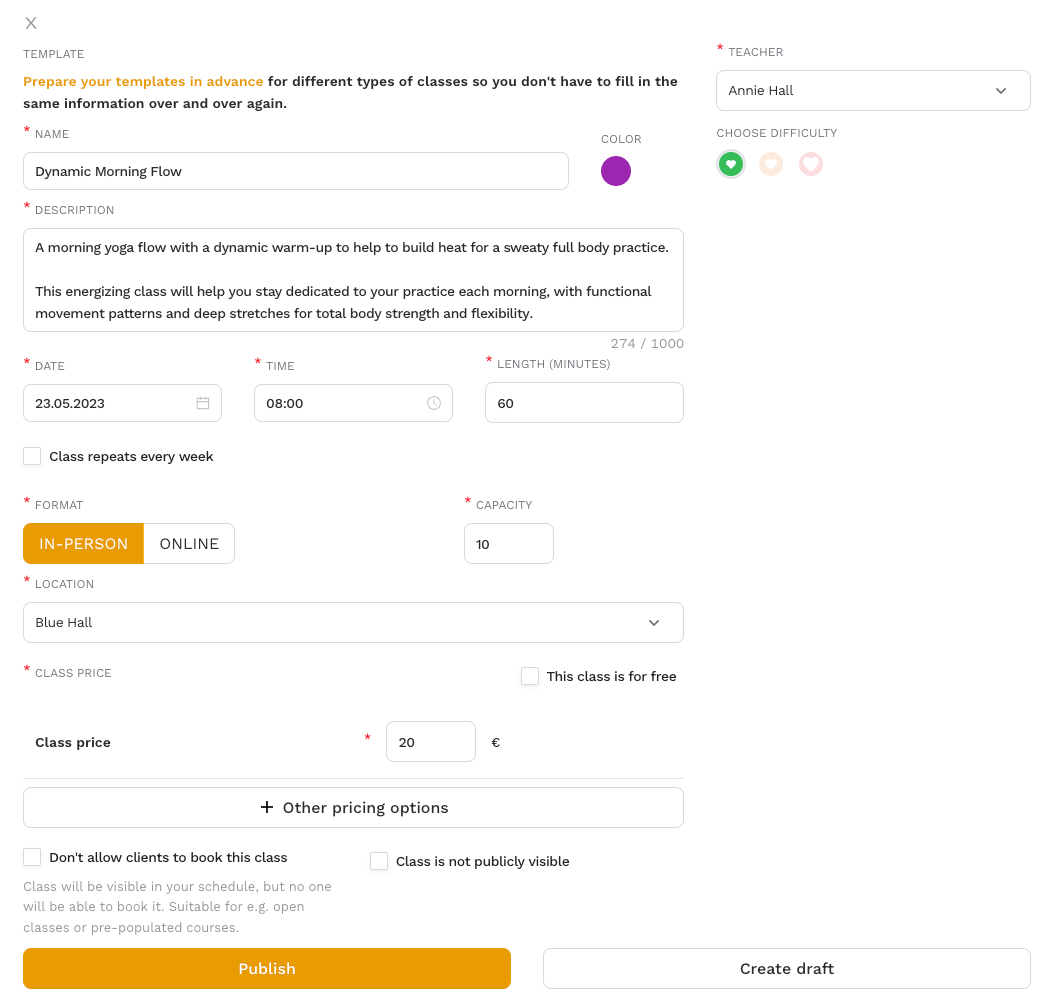
New Open Class
Fill in the title, description (e.g., class details and suitability), date, time, and length. You can also set up regular weekly repetitions.
Choose the venue format, class capacity, and location. Initially, you will have only one location saved in the system, but you can add more locations and select them as needed in the app settings. Set the price and you’re ready to publish your first class!
To simplify class creation, you can use templates, which can be accessed and managed through Settings or directly in the creation window.
Class Creation
In the main Zenamu interface, you can set up a basic class schedule view. Do you prefer to see the entire current week with corresponding classes? Choose the first option. Prefer a list of consecutive classes? Select the second option.
The third option (the eye symbol) shows you the public view of the schedule, giving you an idea of how it appears to clients.

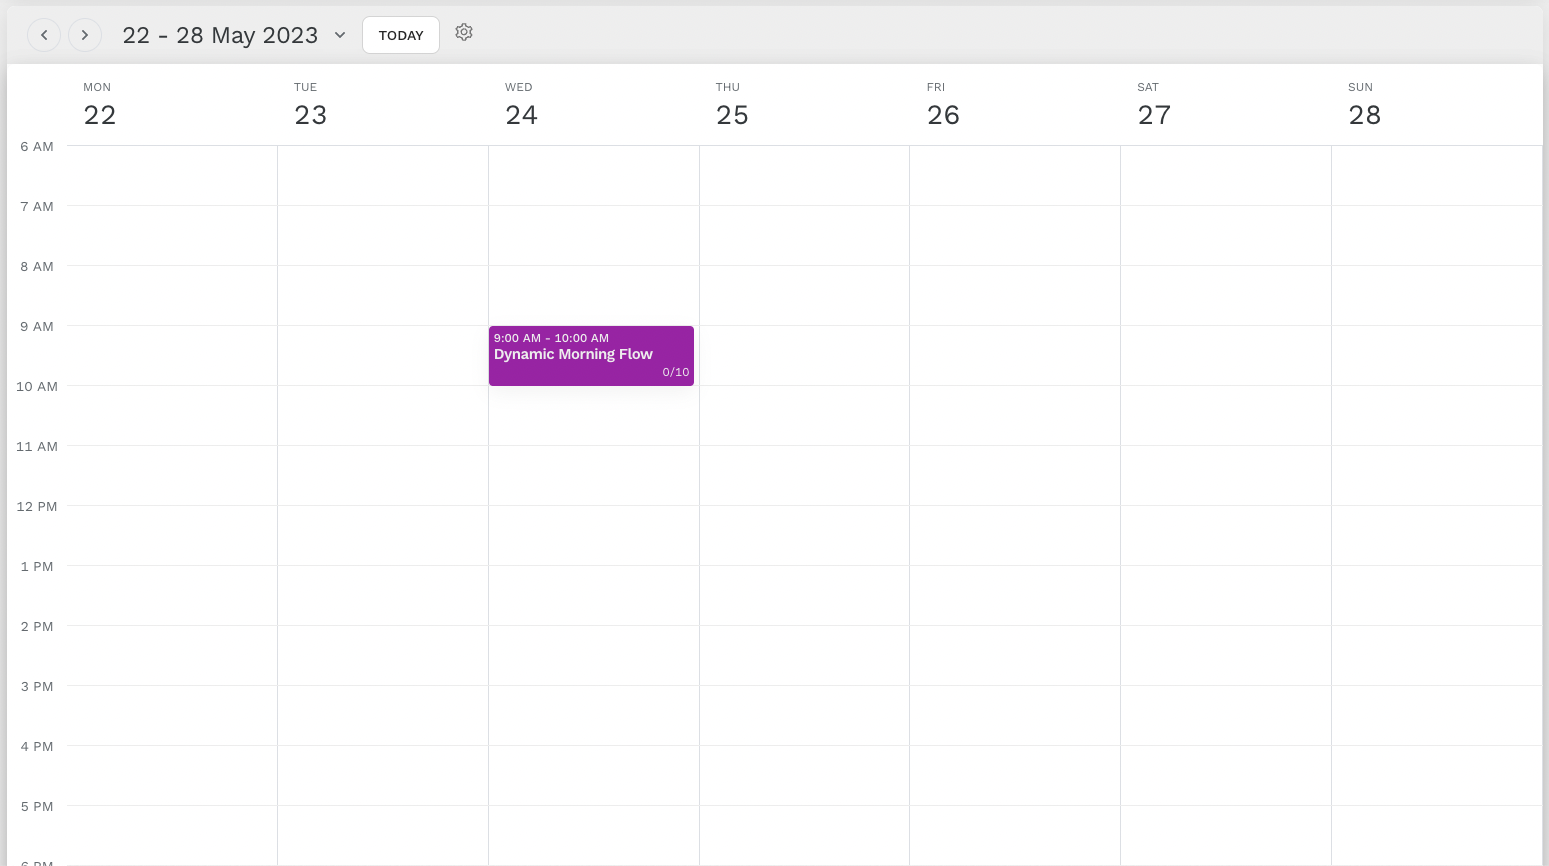
As mentioned in step one, your studio will receive a unique URL for your schedule. You can share this link with clients. For example, the schedule for the fictitious Studio at the Great Yogi shows a Dynamic Morning Flow class every Wednesday at 9am, with a capacity of 10 participants.
We also recommend exploring other tabs on the left sidebar: Clients Overview, All Orders Overview, Your Subscription, and Settings. Here, you can set up bookings, teachers, class templates, and payment options.
For further information on these features, check out our follow-up article First Steps in Zenamu.